Pages

Adding a subwoofer to a BMW 5 series e39

This will be a long post, but I hope it is useful to those who are contemplating upgrading their e39s as I have. As many of you will know, the sound is woeful in the normal 5 and pretty well everyone who has noticed has taken steps to improve the sound. Most replace the speakers, many replace the head unit and some go completely to town and rebuild the interior of the car, building subs, speaker pods and so on.

I've taken the middle ground. I've changed the the head unit and upgraded the speakers (and will detail this in a separate blog) but I've now added an amplifier and a sub with absolutely minimal change to the car yet the change to the sound is simply stunning.

How have I done it? That's easier than I thought it would be. Speakers and head unit are an easy first step, although I never got the steering wheel controls to work. Doors came apart without fuss, the seats come out simply and the whole speaker upgrade took no more than an afternoon to complete. Well worth it. Head unit was again simple, although it was a royal PITA to get the 40-pin adapter cable back into the cavity behind the head unit!!

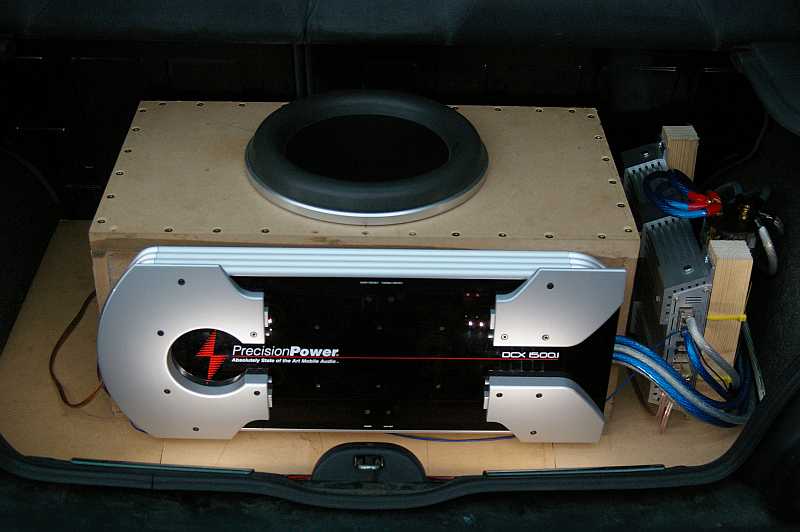
Recently I decided (after listening to my son's Crystals and W7) that maybe an amplifier and sub would help my sound - giving it new depth and weight. However, nice though the W7 sounds, it is a bit big in my son's Clio and would even swamp the 5's boot:

What to get and where to put it?
Having decided I wanted a sub though the next question is: where to put it? Here opinion varies, but the options are:
  • Up under the parcel shelf (as per the M5 sub box that is available) - sounds good, but takes up too much depth.
  • Up against the seat, firing towards the trunk opening - ok, but takes up boot space and I have folding seats too
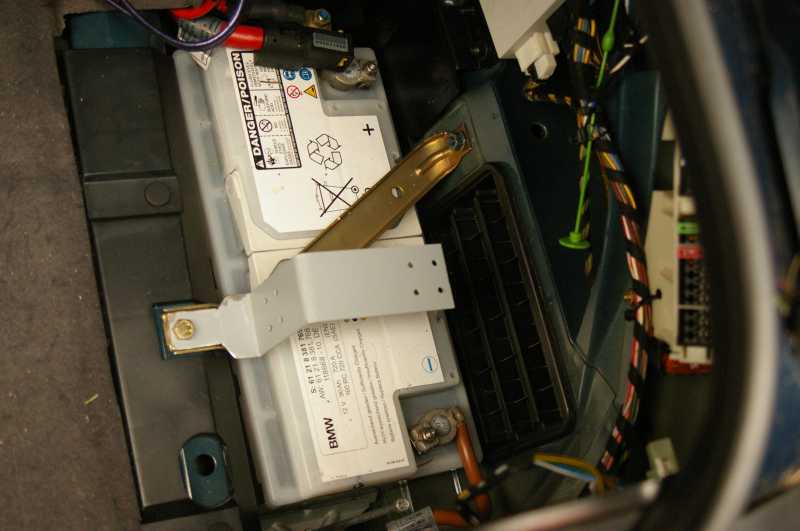
  • In the corner over the battery is good - the whole boot space helps the sub breathe
  • In the cabin under the seat(s) - not good as the sub(s) will not move enough air and it is harder to run the cables in
I also wanted something that would live in the car and would NOT take up boot space, as we use the car for holidays etc. and need the boot space (you would not believe what SWMBO needs when she goes on holiday! :roll: ) Therefore the sub had to:
  • Fit in the battery cover cubby
  • Be removeable completely (I've still got to be able to get to the bulbs, for example)
  • Be wired into the head unit
  • Not interfere with the boot space
  • Be protected against damage from luggage moving about in the boot
Not too tall an order, but the size of the battery cover meant that only an eight inch or a ten inch would fit. I thought about a Basslink and I know that they do fit, but the passive radiator at the back would lose out to the side of the car and would be kinda wasted where I wanted to site the unit so that ruled that out. An infinite baffle sub would suit the area just fine however, and if I can integrate an amp too that would be just great. I did think about building an enclosure as others have done and may still do so in the future, but for speed and to see if it was worth it, I opted for the simple option of buying a powered sub instead.

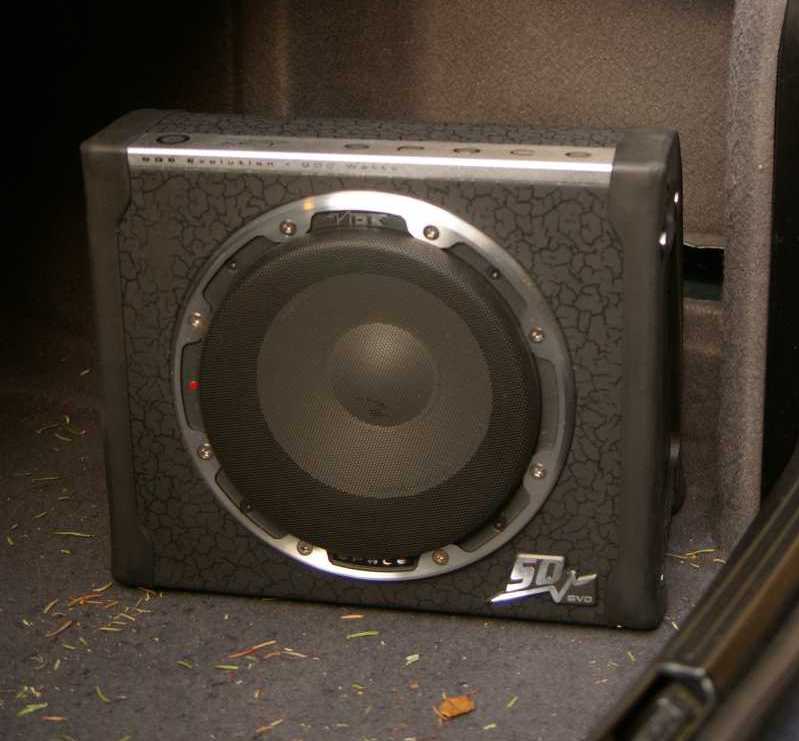
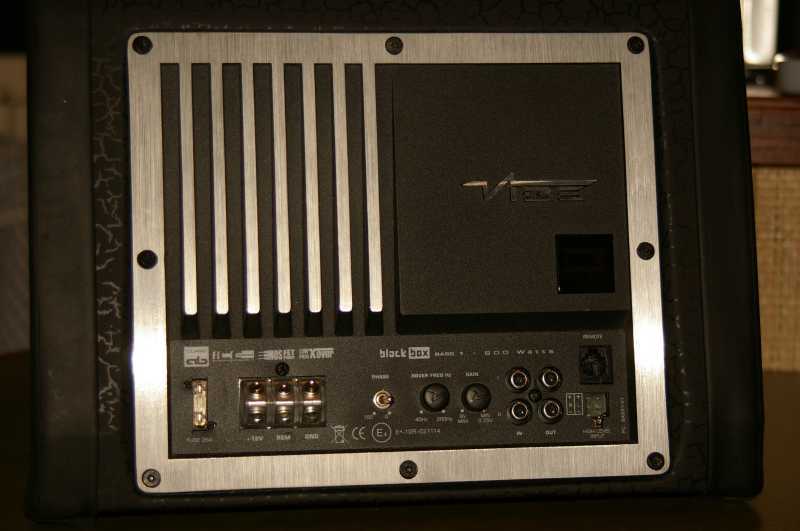
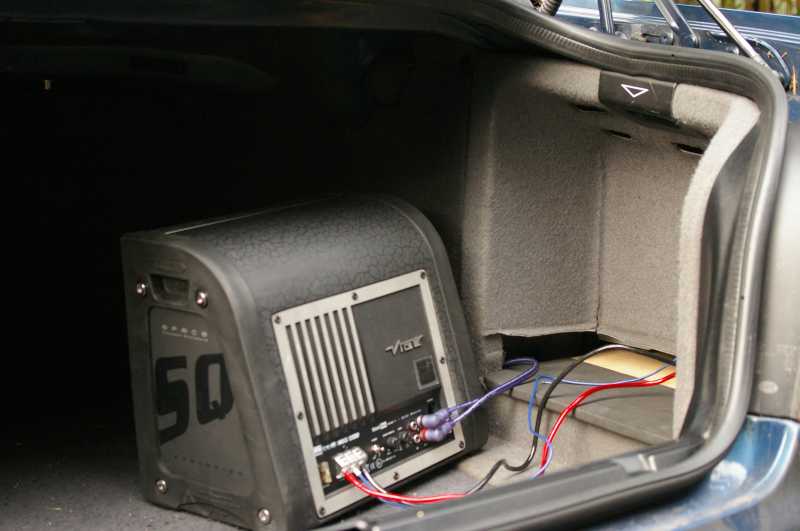
So I looked at what was available in the line of powered subs, compiled a spreadsheet and bought me a Vibe SQ8 EVO8 Active from Car Audio Security in West London having measured up the space above the battery.  It's an 8" amplified enclosure measuring 265mm x 315mm x 180mm
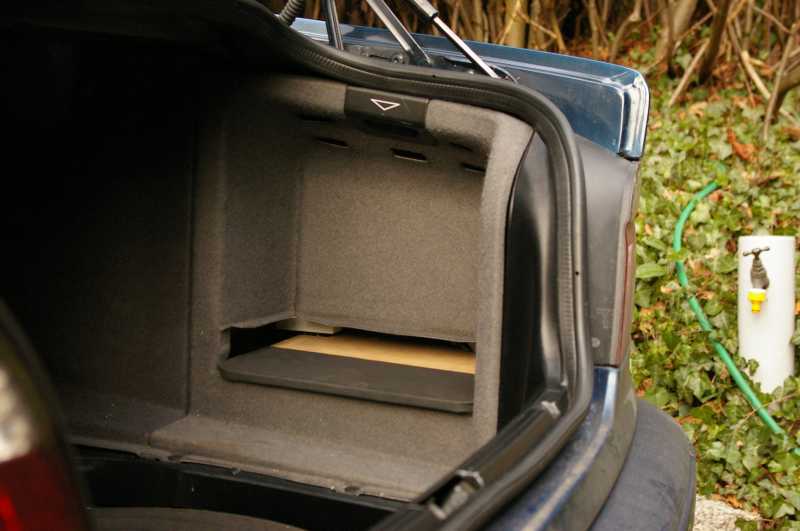

Fitting the sub
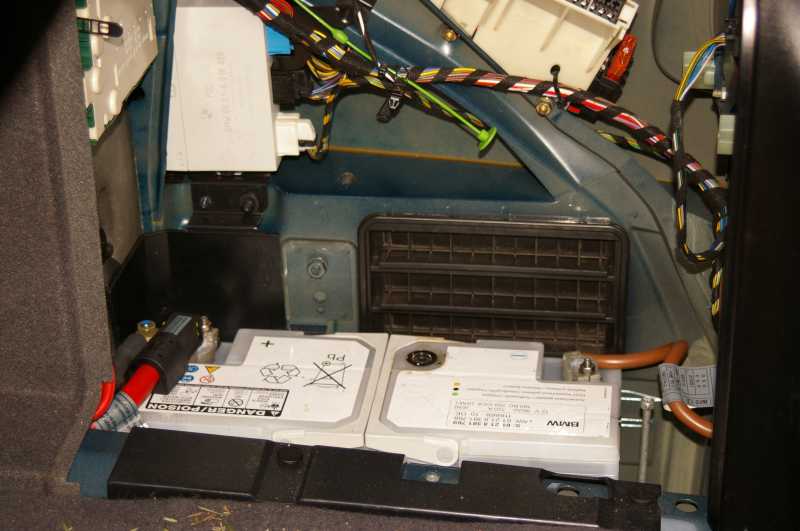
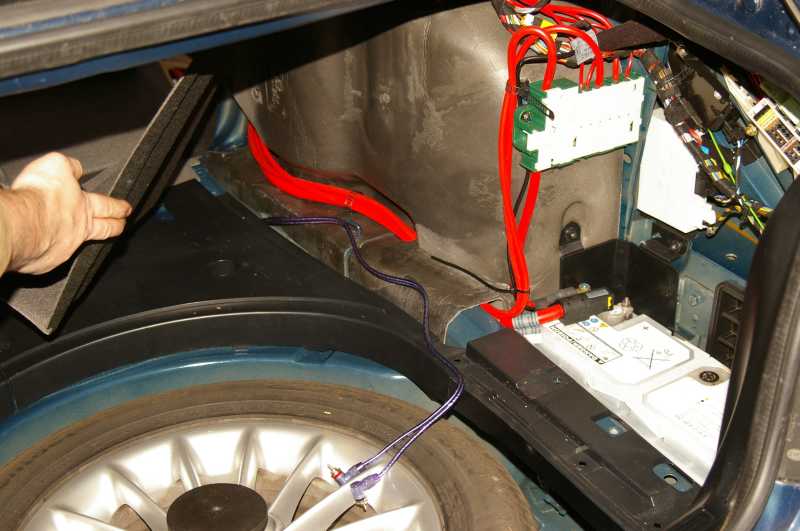
OK, so on to fitting. Taking the battery cover off shows that there is a fair amount of room there and that the area above the battery has a flat panel that would help stabilise any platform I needed. Also, I ordered a spare battery cover from a breakers so I could cut it to fit round the sub. That cost me £15 plus delivery from one of the BMW dismantlers.

One little note. Get one of these - or a plastic equivalent. It beats the socks off using a screwdriver and gouge marks/bloody fingers when removing the panels inside the car.....
So one starts with a piece of MDF and cut it to fit with a jigsaw and sanding tools. It's easier to do this than to measure-and-cut (and I am from the measure-twice-and-cut-one school too!)

Then I fashioned two metal brackets that mount on the battery clamp bolts to secure the platform (these came from the rack mounting bracket of an old D-LINK switch, drilled out, filed and bent to fit)

Wiring next. I'll discuss the power wiring here as that is the simplest to do. Running the audio cables I'll discuss below. Earth wire was added here:

Obviously 12Volts was taken from here (but don't forget to take the fuse out of the wiring kit inline holder before you do ANY connections to the battery!!

 These can be attached to the rear of the sub as shown here
Running the cables
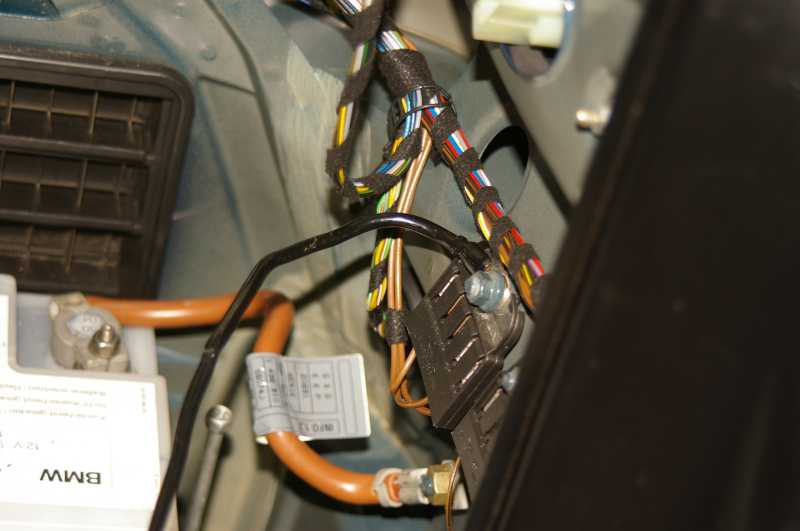
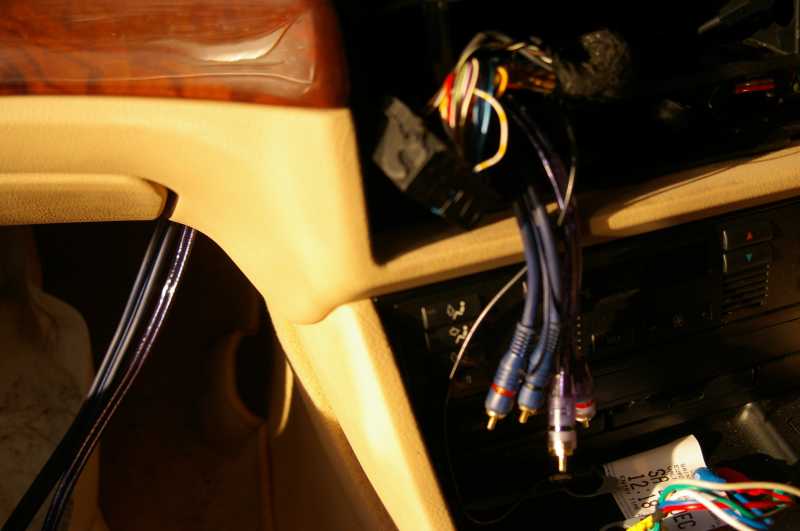
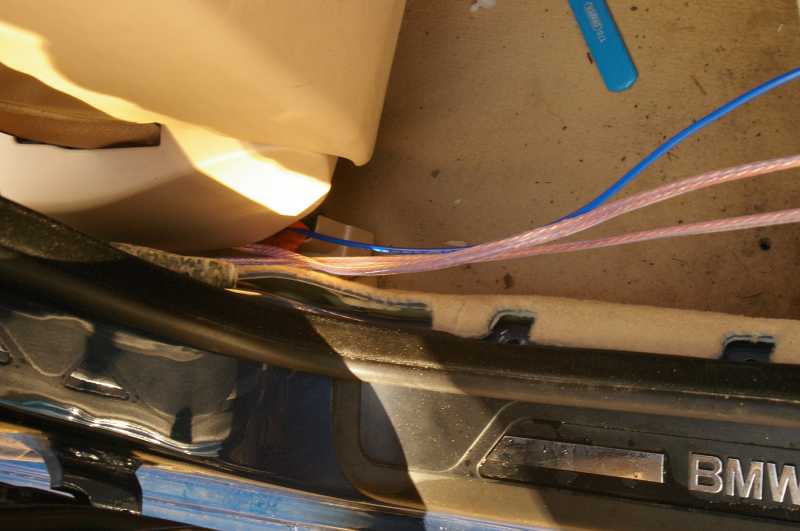
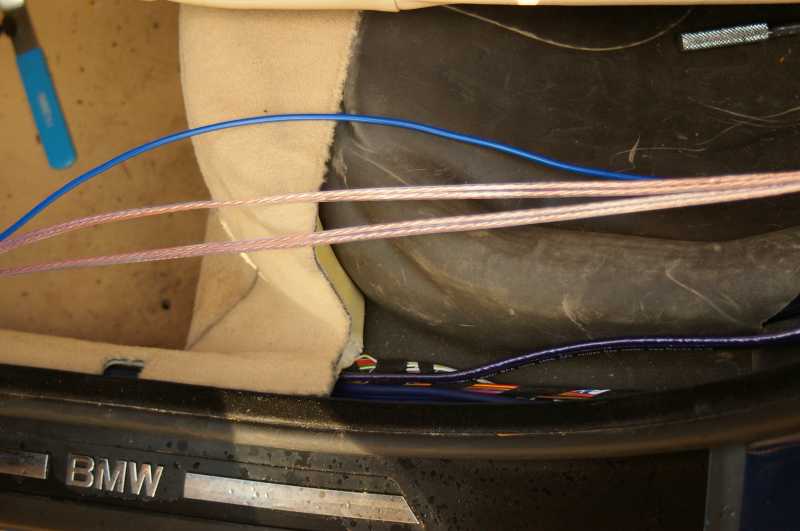
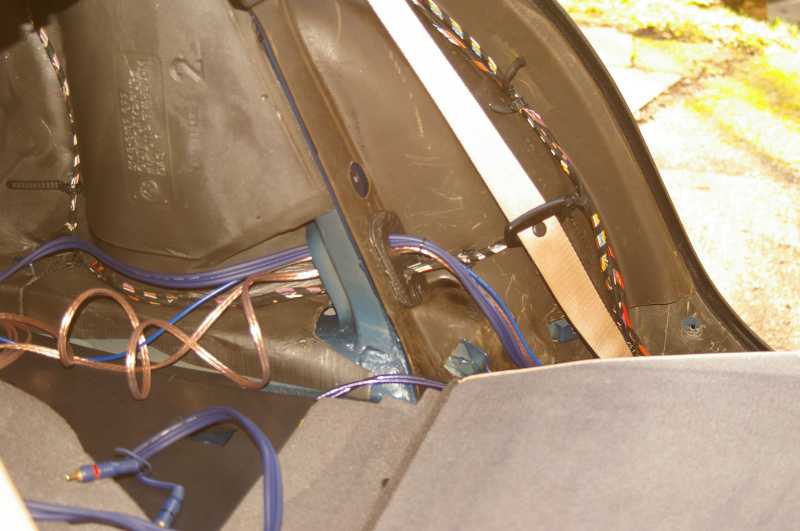
It's on to the audio wiring next and for this we need to start in the cabin of the car. Remember that the power wiring runs down the right side of the car so we will be running the audio wiring down the left (passenger) side of the car. To prepare for this you'll need to think through the cables you need to get the signals from the front of the car to the back. I worked out that I needed two 5m lengths of coaxial interconnect (left and right front to the amplifier, left and right rear to the sub, remote to both amp and sub, and of course the two runs of speaker wire back to the head unit for the front speakers. Also, look hard at what you need to get from your head unit. My Becker came with the four RCA outputs. All I had to do was present them ready for the RCA interconnects.

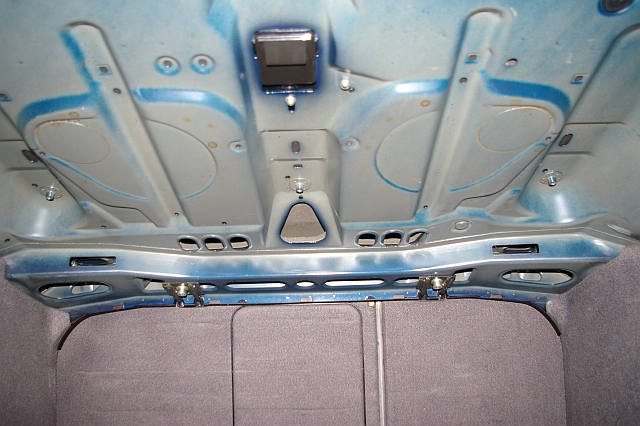
First we need the rear seat and seat side cushions out (this pulls up from the front and two small bolts undone by the doors frees the cushions):

Then remove the kick plates (the quarter-round carpet-coloured plastic pieces along each door sill) from both doors (pull upwards, but you can split them, so be careful).

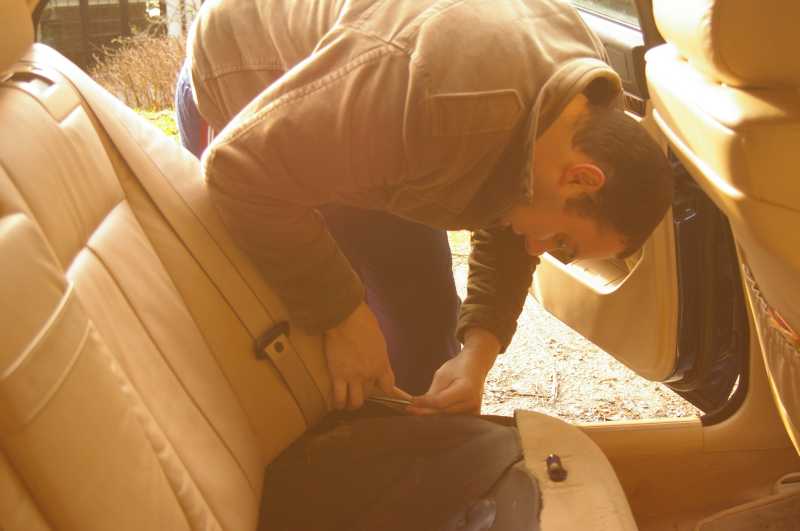
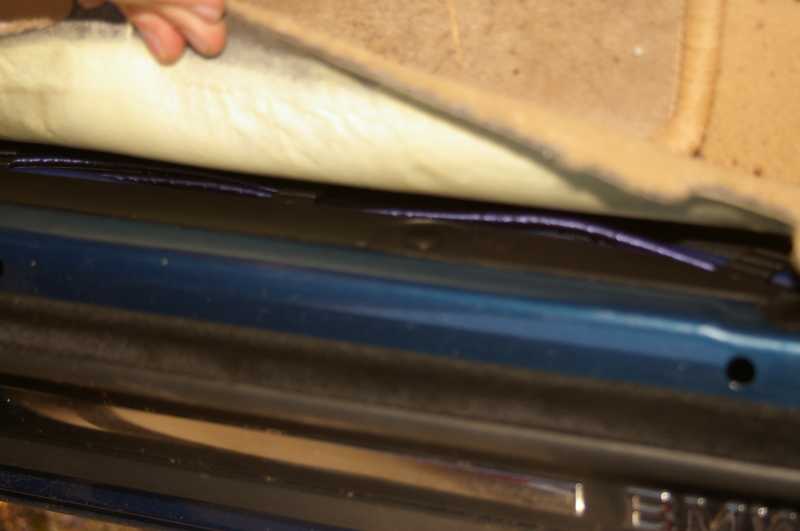
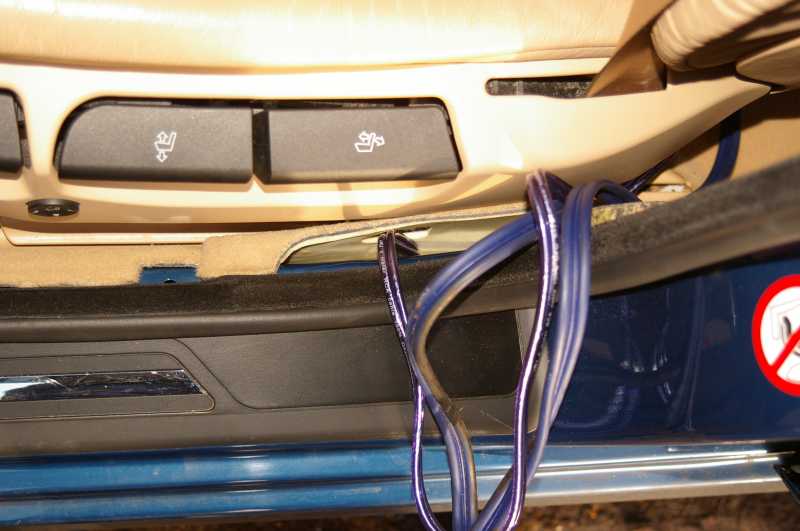
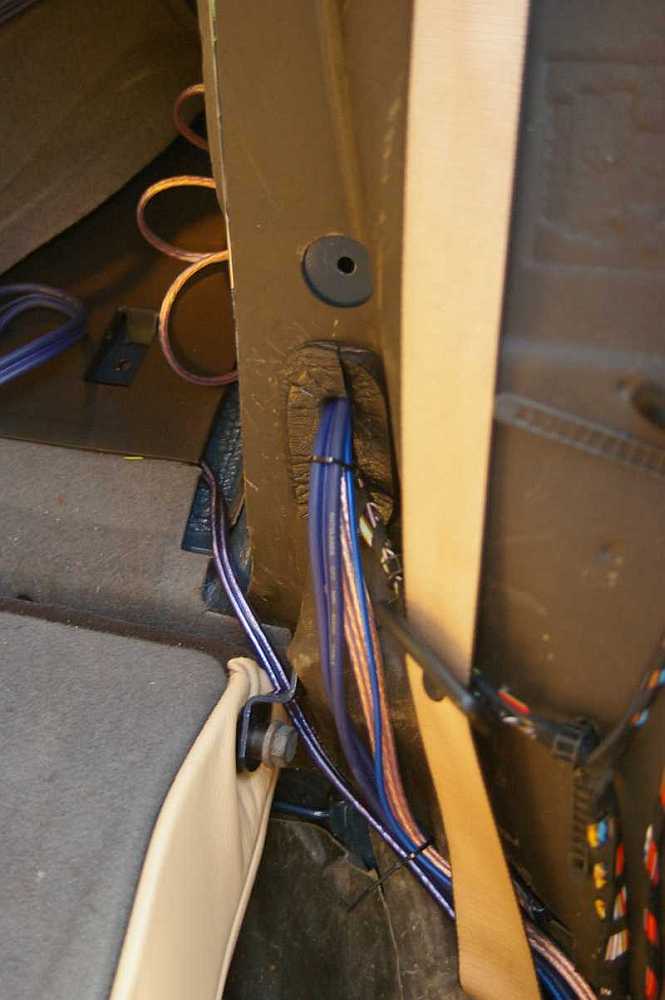
Then remove the B-pillar by pulling/levering carefully out at the bottom, freeing the three poppers. Then slide the pillar down to release the tab at the top

Also, the kick plate in the passenger footwell under the glove compartment needs to come out (it sort of comes down from the dash and slides towards you to release it).

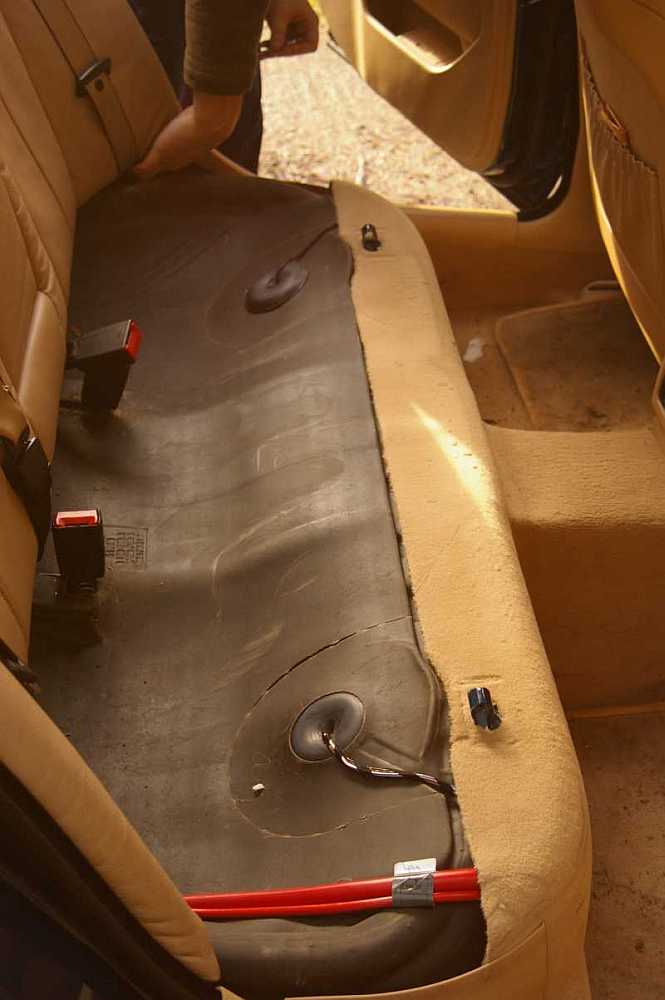
You should now be in a position to run in the cables you need from the head unit to the rear of the car. Start by marking one of the speaker cables at both ends. Make this the RIGHT speaker pair. (I used a small length of tubing, but insulation tape or even a small elastic band would do just as well.) With patience, I got all the cables fitted by starting in the passenger footwell. Feed up the head unit end of each connection and bring them out through the opening ready to connect to the head unit.
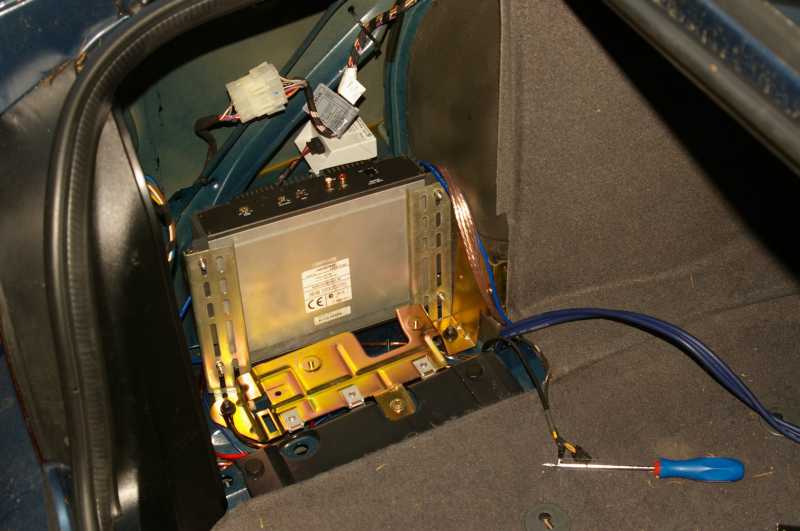
Now, bring the cables across the footwell routing them so that they will not foul the footwell kick-plate when that is refitted, then tuck the cables under the carpet on the left of the footwell down to the door floor.

There is a channel into which cables can be slotted with tabs across to hold them in place. It's a pain to fit as the carpet is a tight fit and the tabs are not finger friendly, but persevere and all will be well.

This channel runs to the back seat and is *just* big enough to hold the cables. At the back seat, bring the cables up and across where the back seat fits.

Now the nice feature about the 5er - there's a hole through the bulkhead through which you can run the cables. (the sub cable was just too short - more about that in a moment)


Installing the Amp
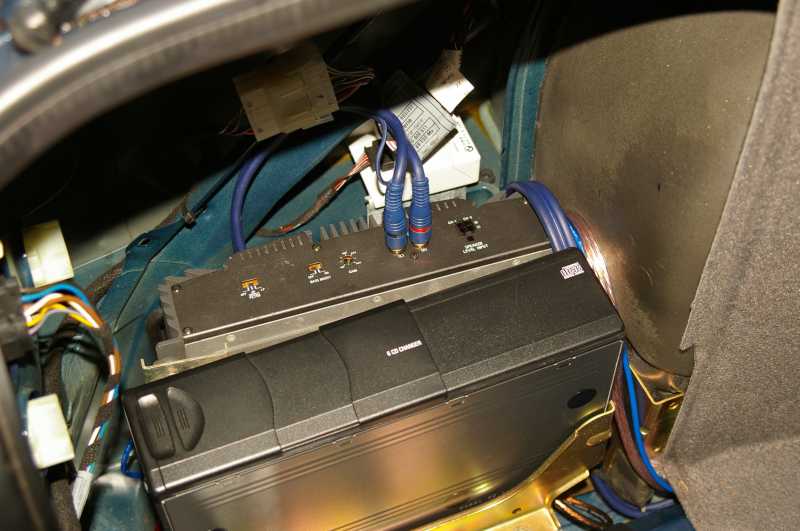
So now we're in the boot. The amp I fitted is an Alpine V-Power 90W 2-channel amp that my son had in his car. A good, basic amp which with the addition of two simple brackets fitted easily and simply behind the CD-Changer on the left of the boot. Perfect!

This needed powering from the battery too, and for this I took the rear skin off the inside of the boot and ran the +12V and a remote cable in as you can see here (again, NO fuse in the inline holder on the red cable until the very last step before testing)

Back to the sub for the moment. The 5m cable is too short to run in tidily so I had to take a short cut across the floor of the boot. Luckily the floor boot has a plastic liner on it which is easily removed. The cable was run directly across this floor so that it reached the back of the sub.

Finishing off
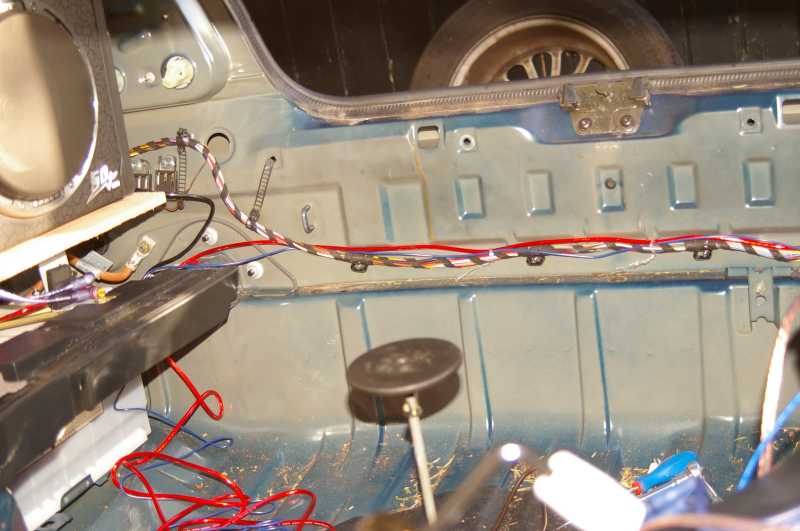
At this point we are almost ready to rock and roll! Re-tracing our steps down the cable run to refit the panels was educational. Fit the B-pillar first - and top tip here - put a small blob of bluetack on the three white fasteners to stop them dropping out as you slide the B-pillar up onto its tab before popping home the fasteners. If you don't, you'll be chasing those pesky things as they drop out just at the most inconvenient time. Then drop the kick-plates on making sure you carefully align the white fasteners over the holes first. Under the dash can be left until you terminate the cables and tidy up.

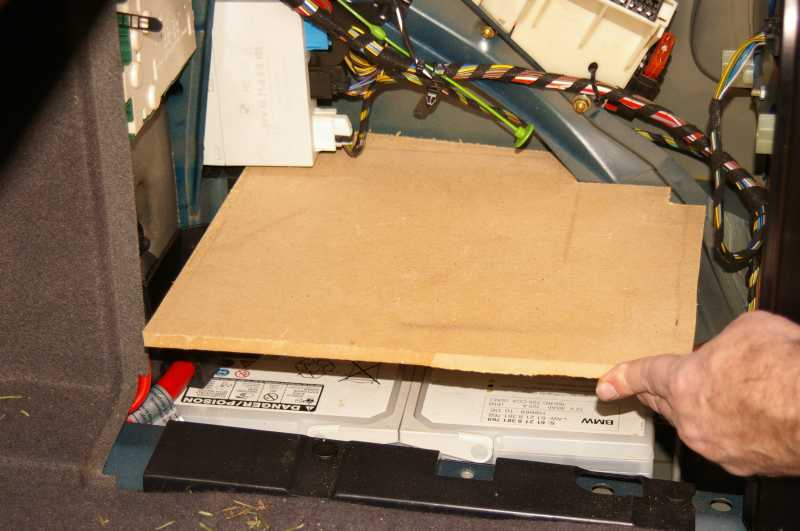
We'll concentrate on the platform to hold the subwoofer next which involves cutting the new battery cover and then fitting it all up. In with the platform, and then trim the replacement battery cover (stanley knife with a new blade, metal ruler and score through the material on the back of the cover before cutting the carpet coating on the front. You'll need to cut down the front to fit under the platform and slice the backs so that the back fits over the back of the sub and the sides fit each side of the sub. Also look and see that I have covered the platform with a sticky-backed rubber that acts as a cushion for the speaker on the platform and finishes off the MDF tidily too. Remember that to get the rear battery bolt done up you will now need an extension for your socket set.

Cabling it all up
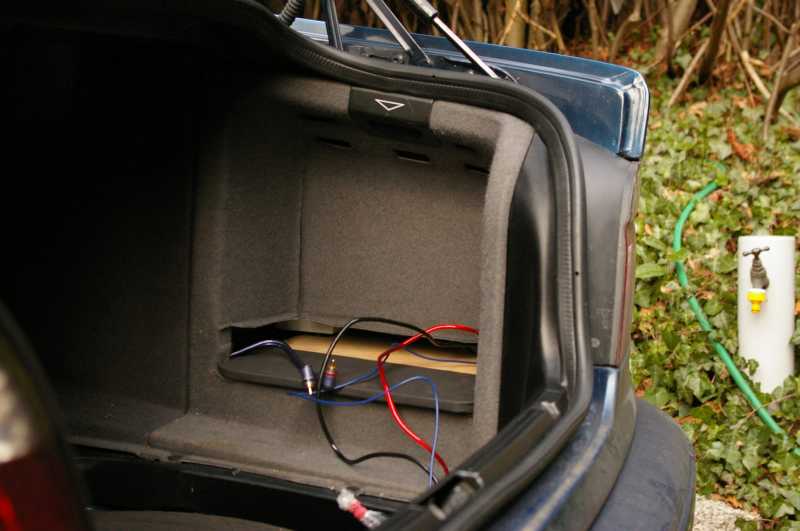
Final stages are to gather all the cables together (you can see here how little spare we have on the 5m RCA cables) and connect up.

Then the last stage is to connect and check the cables. Do yourself a huge favour here and turn the gain of the sub and of the amplifier BOTH to minimum before you go any further.


At the head unit I bought an Autoleads ISO to BMW 40-pin adapter and snipped the front speaker leads in the middle. I then crimped the speaker cables I ran from the back of the car onto the cables connecting to the 40-pin adapter and insulated the cables from the ISO connector so that the head unit amplifier is in no danger of shorting out. Remembering that the marked cables were for the right channel helped get the wiring right first time. Once all complete, I then fought the cables, adapters, connectors and so on back into the cramped space behind the dashboard and re-installed the head unit. Much easier in the boot.

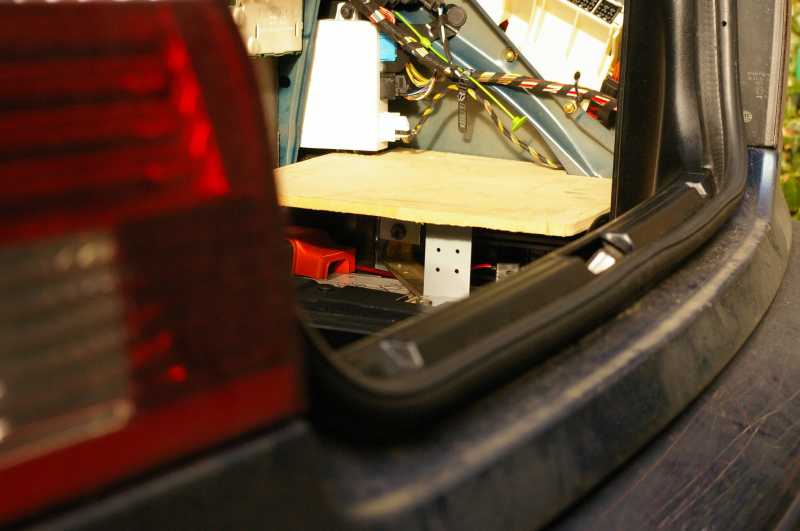
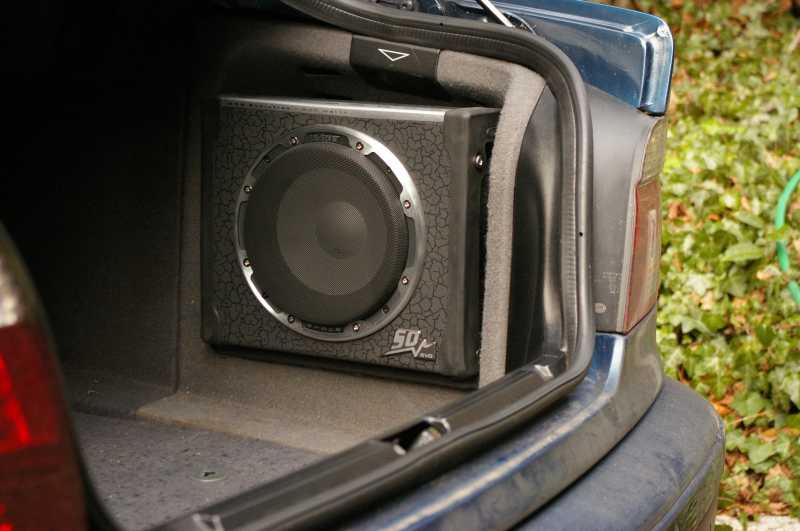
Here's a final picture of the sub installed on the platform with the battery cover in place. It's quite a snug fit, but nevertheless I have also added a clip-on belt that holds the sub to the platform.

Testing now....

Final step is to pop the fuses into the inline holders ... and begin to test. Turning the head unit on now should turn the sub and amp on together (I connected the remote from the head unit to the amp and then from the amp on to the sub). Things may sound funny here because of the settings we put on the amp and sub, but turn up the volume about a quarter turn on the head unit and see that you at least get some sound out of the speakers and that the sound is clean and tidy. Now adjust the settings of the head unit so that bass and treble are both flat during testing then go to the boot of the car. Adjust the gain of the amplifier to make sure everything sounds ok. At a reasonable sound level go back into the car and either with a test CD or a good radio signal try out the volume, balance and fader to make sure the sound goes where it should. Put the head unit volume up to the normal position you would use for listening and then adjust the amplifier gain as necessary to get the level you want. On my amp I have the ability to set a high-pass filter of 80Hz. I switched this filter in to simplify driving the front speakers (the speakers will not be driven so hard, which will prolong their life). After all, the sub should be providing the rest!!

Talking of which, the next stage is the sub itself. You'll remember that the gain and frequency of the sub should both be at minumum - i.e. the sub is effectively off. To start, set the sub frequency control to about 1/3 to mid-way and then start to increase the gain. You should hear the sub start to contribute to the sound. It's going to be difficult to really set it up without a proper test CD so be prepared for a little trial-and-error and to-ing and fro-ing to the drivers seat. Better yet is if you can someone else to tweak the controls for you while you listen. There are test tracks available that will make this much simper.  You can order the EMMA test CD's here . That should make the job a little easier. There are downloadable versions available too.

One final step that will help improve the bass in the cabin is to pop out the two round inserts in the parcel shelf and to remove the sound deadening above them. They pop out by thumping them with your fist and did make a clear difference to the sound.


And how does it all sound? Well the components in the doors now sing, with clear treble and so much detail. Really glad I chose silk tweeters as they go loud without going harsh. The amplifier just .. works. It's great. Loud yet relaxed. Lots more dynamics to the music without being constrained by the Becker's internal amplifier. And the sub? SO much more. I know everyone sings the praises of their installations, but I have found I get out of the car with a huge smile on my face sometimes. I drive slower, take the long way round just to hear the music. Really surprised how low the sub goes too. Cypress Hill - Lightning Strikes is a good example. It's really opened up what is possible from the 5 - and the superb sound insulation of the car keeps both leakage from the boot to a minimum and reduces the sound of the road noise too.

Using a Trail Camera indoors

I have a ProStalk PC2000 Trail Camera thanks to the kindness of my children.  I'm supposed to use this outdoors to 'trap' wildlife and photograph them but the weather's been too bad since Christmas to really concentrate on that.  However, we've been seeing evidence that we have mice in the house, so I thought I'd try to use this camera indoors to find the culprit...

The first efforts I made were not good: Many photographs taken were useless (they were mainly whiteouts), because the camera is too sensitive and the night lights too bright for the close work needed indoors.
So thinking this through, I worked out that to get sensible pictures I needed to adjust the camera to reduce its sensitivity to get the results I wanted.  Now as this unit is essentially a 'sealed unit' (it's protected against the elements) it does not have many controls you can access like a normal camera.  Therefore, I couldn't actually alter the camera settings.  What next?  Well, the only thing left is to reduce the light emitted by the nightlight (the 15x IR LED's fitted to the camera shown here on the lower half of the camera)
This turned out to be easier than you might think.  All you need to do is to fix a filter to the front of the camera covering the IR LED's and that's it; Job done.  Well, almost.  You need to find the right filter.  I estimated that I needed to reduce the amount of IR light to about 10% of its original value and to achieve this I had to choose a good filter.  As I am an engineer with computing tendencies, I have a number of anti-static bags around that are used to protect sensitive electronic components such as memory chips and hard drives.  These are made of silvered plastic and are almost opaque.
I tried one of these on the front of the camera held in place with an elastic band ...
... and the results were just what I wanted. Now all I need to do is make the mouse stand still long enough for a clear picture.

Facebook's 'Instant Personalisation': How to disable it and why.

Facebook launches 'Instant Personalisation' today (02/02/2011).  This new feature is designed to break down the walls between the social network of Facebook and more traditional web sites.  It's supposed to let these external web sites have access to some of yours and your friends Facebook data.  Facebook claim that in doing this, they make your whole web experience a place that you apparently 'share' with your friends - you and your friends interests are shared with the site and that site content is then tailored to you when you visit.  However, this is also raising serious privacy concerns as more and more of your data will be copied - and stored - elsewhere on the Internet without you being aware of it.

How It Works
Provided at some point while you have been browsing you have logged in to Facebook, certain web sites (such as Bing and TripAdvisor) can personalise the pages you see on their sites with information they have taken from your Facebook account.  Any information marked as available to 'Everyone' on Facebook will now become available to these web sites - for example your name, or your birthday, or what your friend thought of a city you are planning to visit.

Facebook is currently working with certain partner sites (such as Bing, TripAdvisor, and Scribd) and there will be notifications for you on your first visit to these sites to disable this sharing.  This is assuming, of course, that these and future external sites adhere to Facebook's code of conduct....

Now, what people may NOT realise is that when it is introduced on Facebook, 'Instant Personalisation' will enabled by default.  Now I would have preferred to have been given the chance to positively opt-in to this new feature, rather than find out when I go to Bing that they already have access to my data!

How to disable "Instant Personalisation"
Luckily, Facebook have provided a facility to disable 'Instant Personalisation' and I present below the simple steps needed to turn it off:
  1. On your Facebook page go to the top right of the window and click on Account.  From the drop-down list, click on Privacy Settings
  2. On the next screen you see, go to the bottom left and click on Edit Your Settings under "Apps and Websites"
  3. On the next screen you see, click the Edit Settings button to the right of 'Instant Personalisation'
  4. Close the short video clip that pops up to introduce the feature
  5. Now simply untick the tick box at the bottom left labelled Enable instant personalisation on partner websites.
Note that Instant Personalisation is not yet available to everyone, so if the last option is greyed out you should retry in a few hours or a few days time - or if you see a notification pop up from one of the partner web sites.